Using CheckSUR to repair Windows file corruption

Microsoft has developed a System Update Readiness tool which can identify and repair Windows system file corruption that could prevent other updates from being installed. The tool is available for all editions of Windows since Vista/Server 2008 and is published under KB947821. The utility installs as a MSU package on older platforms, and is baked in for Windows 8 and Server 2012 with the DISM utility. This utility is often referred to as CheckSUR – short for Check System Update Readiness.

Once installed, a log is generated under %windir%\Logs\CBS\CheckSUR.log. If CheckSUR is able to automatically repair files, it will do so and report this in the log file. For any corruption which cannot be automatically repaired, we can still use this utility to manually fix these items. You will find the KB article number of files that cannot be repaired in the CheckSUR log file:

=================================
Checking System Update Readiness.
Binary Version 6.1.7601.21645
Package Version 15.0
2012-07-06 13:57

Checking Windows Servicing Packages

Checking Package Manifests and Catalogs
(f)    CBS MUM Corrupt    0x00000000    servicing\Packages\Package_2_for_KB2685939~31bf3856ad364e35~amd64~~6.1.1.2.mum        Expected file name Microsoft-Windows-Foundation-Package~31bf3856ad364e35~amd64~~6.1.7600.16385.mum does not match the actual file name

Checking Package Watchlist
Checking Component Watchlist
Checking Packages
Checking Component Store

Summary:
Seconds executed: 109
Found 1 errors
CBS MUM Corrupt Total count: 1

Unavailable repair files:    servicing\packages\Package_2_for_KB2685939~31bf3856ad364e35~amd64~~6.1.1.2.mum   servicing\packages\Package_2_for_KB2685939~31bf3856ad364e35~amd64~~6.1.1.2.cat

From this log, we can see the corrupt files are part of KB2685939. To repair, you can follow these instructions.

1. Download the appropriate update package for KB2685939 for the target system from the Microsoft Download Center.

2. Expand the package using the expand command (this assumes the package was downloaded to C:\temp and that we’re expanding to C:\temp\KB2685939):

expand C:\temp\Windows6.1-KB2685939-x64.msu /f:* C:\temp\KB2685939

3. Expand the cab files to the same directory:

expand C:\temp\Windows6.1-KB2685939-x64.cab /f:* C:\temp\KB2685939

4. Copy the expanded *.mum and *.cat files to %windir%\Temp\CheckSUR\servicing\packages:

copy C:\temp\KB2685939\*.mum %windir%\Temp\CheckSUR\servicing\packages\
copy C:\temp\KB2685939\*.cat %windir%\Temp\CheckSUR\servicing\packages\

5. Re-run the System Update Readiness tool which will use the files in the %windir%\Temp\CheckSUR\servicing\packages folder to repair the corrupt or missing files.
Configure VMM 2012 SP1 Network Virtualization for use with Service Management Portal

With the RTM release of the Service Management Portal from Microsoft, hosters can configure VMM 2012 SP1 to allow self-service tenants to create NVGRE networks for use with VM’s deployed through the portal. The VMM Engineering Blog has a great post that provides a basis for understanding how Network Virtualization is configured in VMM 2012 SP1.

The process can be summarized as follows:

  1. Create a Logical Network with a Network Site & Subnet for use as the Provider Address.
  2. Create an IP Pool on the Logical Network for the Provider Address space.
  3. Create a Host Port Profile linked to the Network Site created in step 1.
  4. Optional: Create a port classification and profile for the virtual adapter. This will allow you to enable DHCP and Router guard on your templates and hardware profiles.
  5. Create the Logical Switch referencing the Host Port Profile (and Virtual Port Classification and Profile if you created them).
  6. Assign the Logical Switch to your Hyper-V hosts.
  7. Assign the Logical Network to your Cloud.
  8. Create a default VM Network for use with templates and hardware profiles.

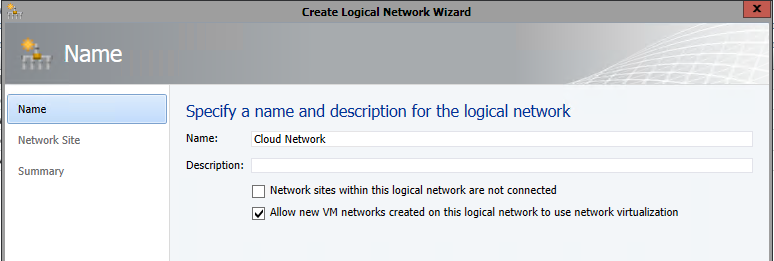
To create the logical network, in VMM, go to Fabric > Networking > Logical Network and select Create Logical Network from the ribbon menu. Give the network a name (this is what will appear in the Katal portal) and select the “Allow new VM networks created on this logical network to use network virtualization” checkbox, then click Next.Create Logical Network

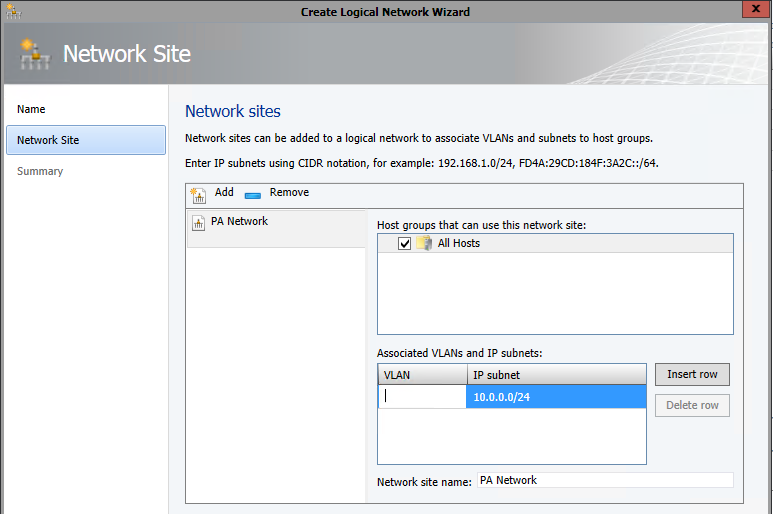
Add a new network site to be used as the Provider Address network. This is what the Hyper-V hosts will use to communicate with one another.Create Network Site

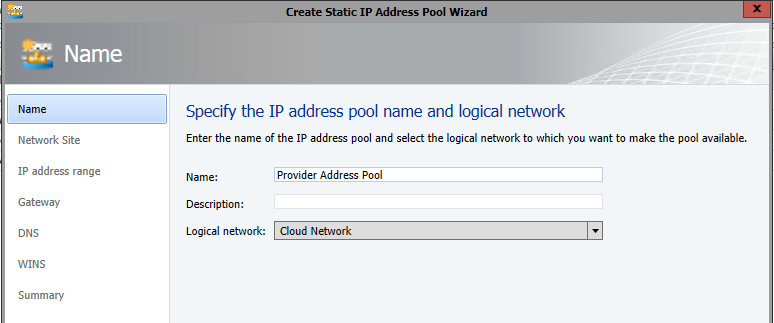
Now that a Logical Network and Site have been created, we’ll need to create an IP Pool for the Provider Addresses. Right-click on your logical network, and select Create IP Pool. Create IP Pool

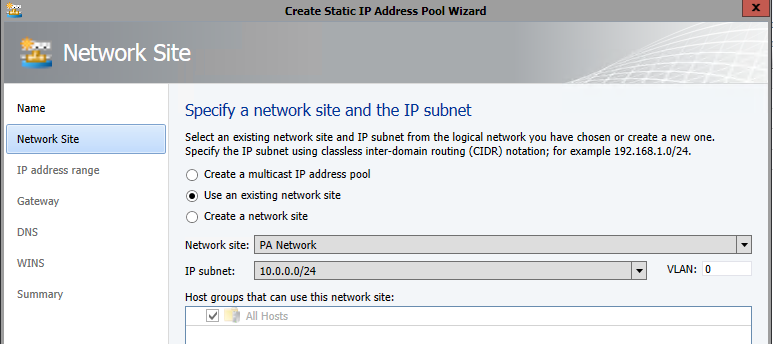
Associate the Pool with the Network Site we created in the previous step.Associate Pool with Network Site

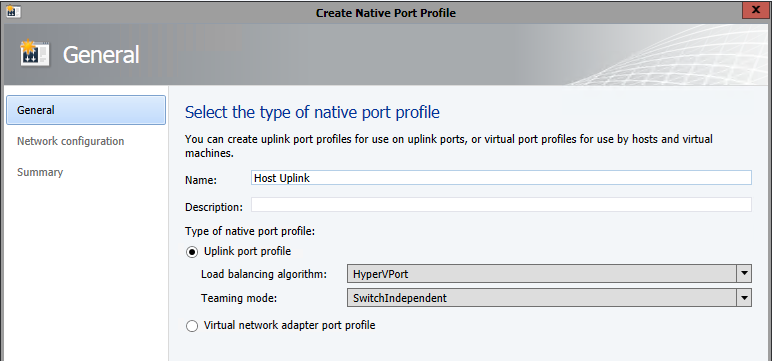
You can leave the default range and specify gateway and DNS settings if your Hyper-V hosts span multiple subnets. Next, we’ll want to create a Host Port Profile and associate it with the network site. Right-click Fabric > Networking > Native Port Profiles and select Create Native Port Profile. Name it appropriately and change the type to Uplink port profile.Create Host Port Profile

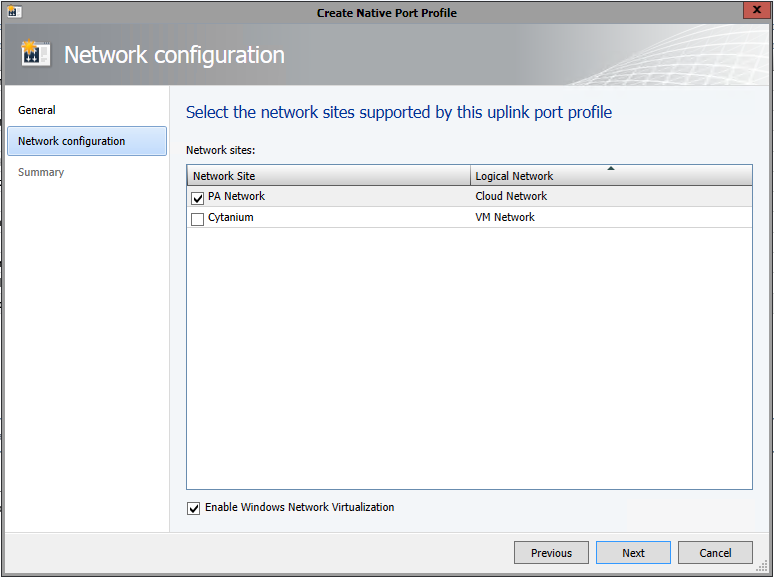
Associate the Port Profile with the Network Site we created on the Logical Switch and check the checkbox to Enable Windows Network Virtualization. Click Next and Finish.Associate Network Site with Uplink Port Profile

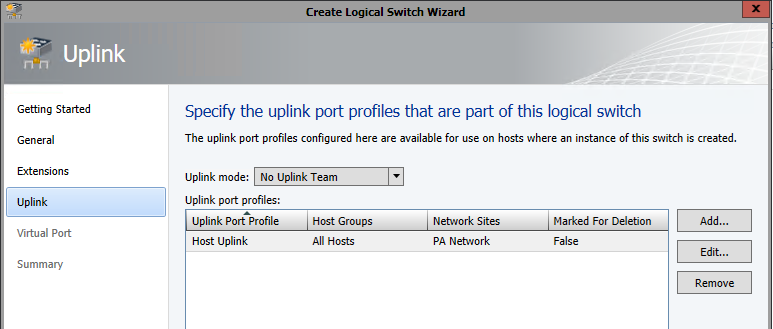
Optionally, you can create a virtual port classification and profile. This will allow you to enable/disable virtual adapter features or create tiers of service. Next, we can create the Logical Switch. From Fabric > Networking > Logical Switches select Create Logical Switch in the ribbon. Give the Switch a name and specify extensions as necessary. Associate the Uplink port profile we created in the previous step.Associate Logical Switch with Uplink Port Profile

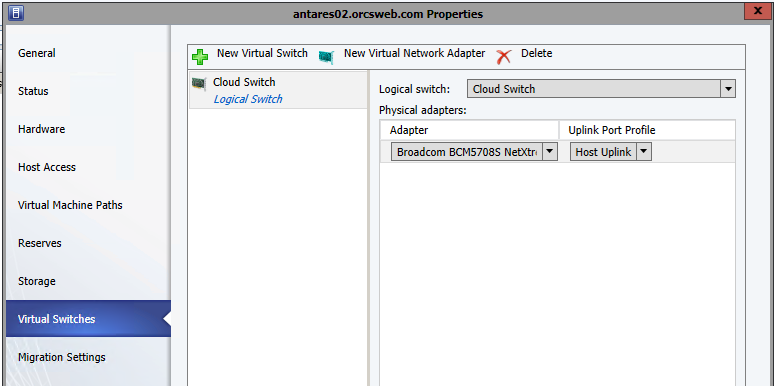
Add you virtual port profiles if you created them and then click Finish to create the switch. We’ll now need to associate the switch with our host(s). Find your host under Fabric > Servers > All Hosts > Hostname, right-click and select properties. Click Virtual Switches and then click New Virtual Switch > New Logical Switch. If you have multiple Logical Switches, select the switch we created in the previous step, then select the appropriate adapter(s) and the Uplink Port Profile we created previously. Click OK to assign the logical switch.Assign Switch

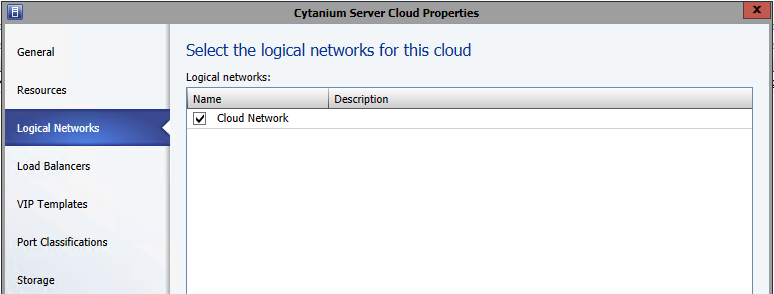
Once the job completes, we’ll be able to associate our Logical Network with our cloud which will allow it to show up in the Service Management Portal. Under VMs and Services > Clouds, right-click on the name of your cloud and select Properties. Click Logical Networks, and select the checkbox next to the name of the Logical Network we created in the first step. Click OK.Assign Logical Network


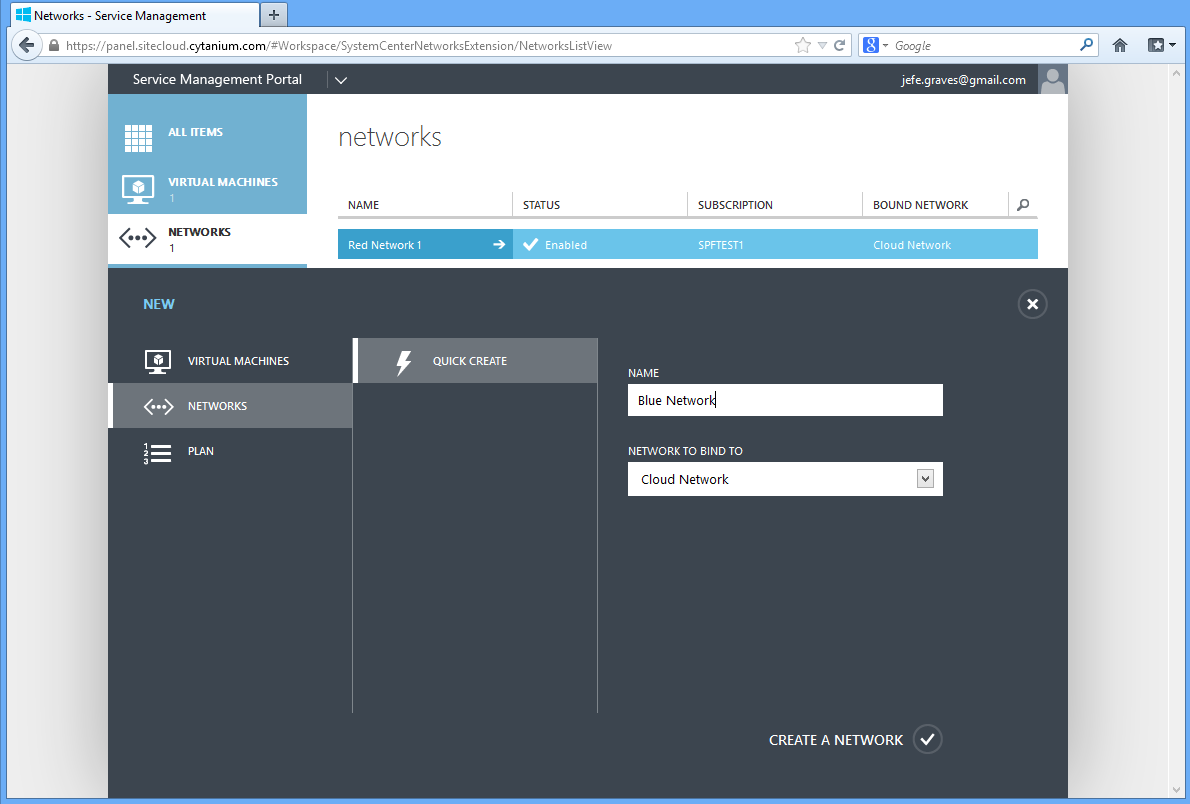
You can now create VM Networks in the Service Management Portal that are bound to the Logical Network using NVGRE.Service Management Portal Create Network

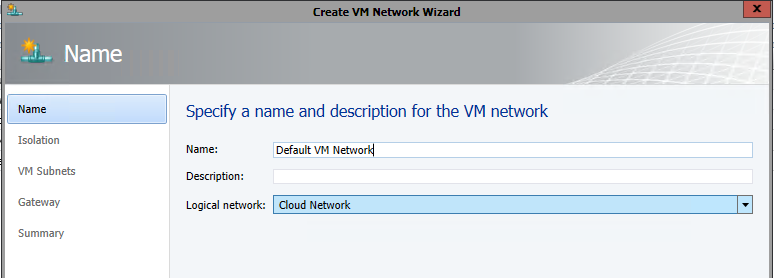
The last step is to create a default VM Network to associate with our templates and hardware profiles. Select VMs and Services > VM Networks and click Create VM Network from the Ribbon. Name the name and associate it with the Logical Network we created in step 1.Create Default VM Network

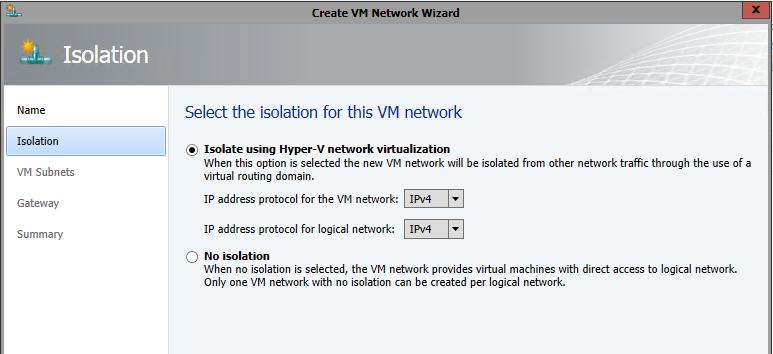
Chose the option to Isolate using Hyper-V network virtualization with IPv4 addresses for VM and logical networks.Configure NVGRE Isolation

Specify a subnet for VM Network though it will not be used. Select No connectivity on the External connectivity screen and click Finish to create the VM Network. Configure your templates and hardware profiles to use this VM Network in order for them to work properly in the Service Management Portal.

SQL Server Reporting Services error installing DPM 2012 SP1 with remote SQL 2012 database

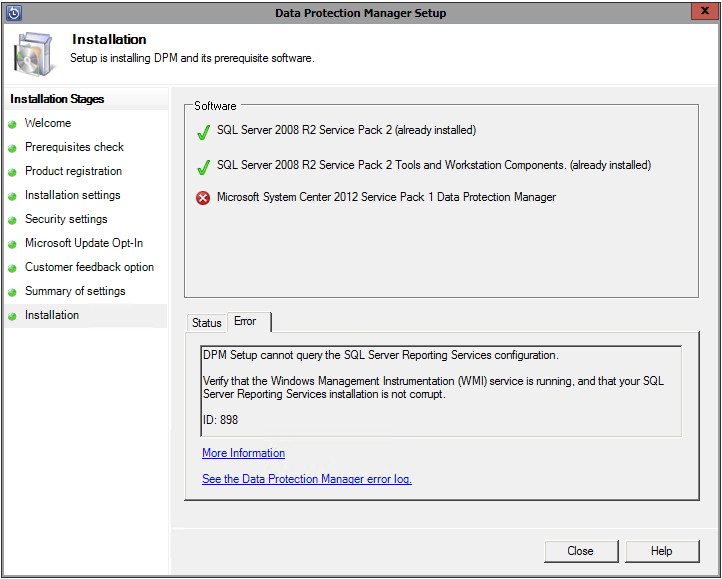
We use Microsoft Data Protection Manager in our environment to protect our Windows workloads. Recently, DPM 2012 SP1 was released and we have begun the process of upgrading each of our DPM servers to this version, but encountered a problem with the latest server to be upgraded. Though the prerequisite check was successful, DPM would fail to install citing an error with SQL Server Reporting Services on our remote SQL 2012 server:

DPM Setup cannot query the SQL Server Reporting Services configuration

DPM Setup cannot query the SQL Server Reporting Services configuration

Viewing the error log, we can see the following error attempting to query the SSRS configuration via WMI:

[3/4/2013 12:05:44 PM] Information : Getting the reporting secure connection level for DPMSQL01/MSSQLSERVER
[3/4/2013 12:05:44 PM] Information : Querying WMI Namespace: \\DPMSQL01\root\Microsoft\SqlServer\ReportServer\RS_MSSQLSERVER\v10\admin for query: SELECT * FROM MSReportServer_ConfigurationSetting WHERE InstanceName=’MSSQLSERVER’
[3/4/2013 12:05:44 PM] * Exception : => System.Management.ManagementException: Provider load failure

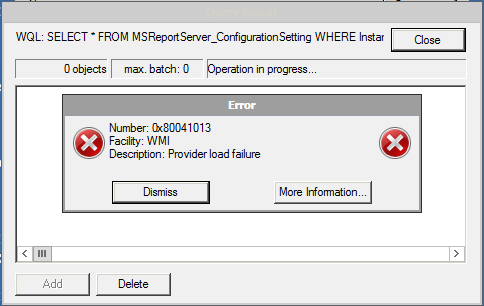
DPM is using WMI to get information about the SSRS installation, and is getting a “Provider load failure” error message. The natural troubleshooting technique here is to attempt to run this query manually via wbemtest from the SQL server itself, and sure enough, we end up with a 0x80041013 “Provider Load Failure” error message:

0x80041013 Provider Load Failure

0x80041013 Provider Load Failure

The SQL Server was originally deployed as SQL 2008 R2 and then upgraded to SQL 2012 SP1. Though there is a KB article describing this issue, there is no update for SQL 2012 SP1. You’ll also notice that the path mentioned in the error code includes v10 – which refers to SQL 2008. So, it seems as though the underlying problem has to do with an issue with the upgrade from SQL 2008 R2 to SQL 2012 and the WMI namespace.

Rather than open a PSS case to find the root cause, we decided it was probably faster to uninstall SQL entirely, then install a fresh instance of SQL 2012 and restore the DPM databases. If you choose to go this route, be sure to take a backup of your SSRS encryption key, DPM databases, master db, msdb, and the SSRS databases. If you don’t, you’ll spend hours reconfiguring reports, setting up SQL security and you’ll have to run DPMSync to recreate the SQL jobs.