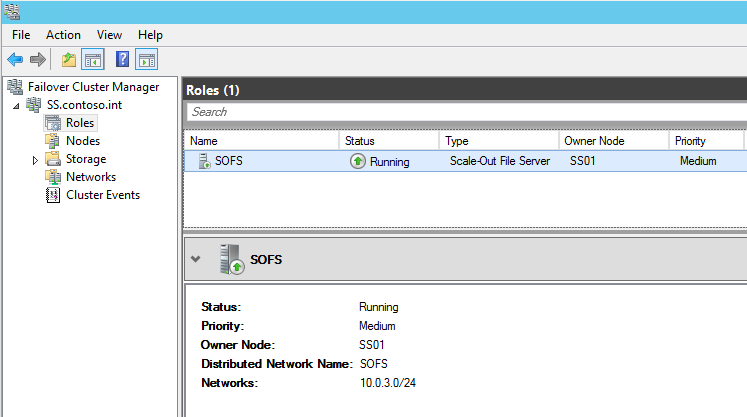
Let me start off by saying this is one of the most exciting new features in the next version of Windows Server. Prior to joining Microsoft, as a customer, I had been begging for this feature for years. Well, the product team has delivered – and in a big way. All of the testing I have performed on this has shown that this is a solid technology, with minimal performance overhead. You can expect to see near line-rate network speeds and full utilization of disk performance. It is as resilient as you would expect, and as flexible as you will need. Recently announced at Ignite 2015, Storage Spaces Direct (S2D) is available in the Server 2016.
The previous version of storage spaces relied on a shared SAS JBOD being connected to all storage nodes. While this helps reduce the cost of storage by replacing expensive SANs with less expensive SAS JBOD’s, it still is a higher cost than leveraging DAS for a few reasons: Dual-port SAS drives are required in order to provide redundant connectivity to the SAS backplane, the JBOD itself has additional cost, and the datacenter costs associated with the rack space, power, and cabling for the JBOD shelf. Storage Spaces Direct overcomes these hurdles by leveraging local disks in server chassis, thereby creating cloud storage out of the lowest cost hardware. You can finally leverage SATA SSD’s with Storage Spaces and still maintain redundancy and failover capabilities. Data is synchronously replicated to disks on other nodes of the cluster leveraging SMB3, meaning you can take advantage of SMB Multichannel and RDMA capable nics for maximum performance.
Here’s a quick look at a Storage Spaces Direct deployment in my lab:
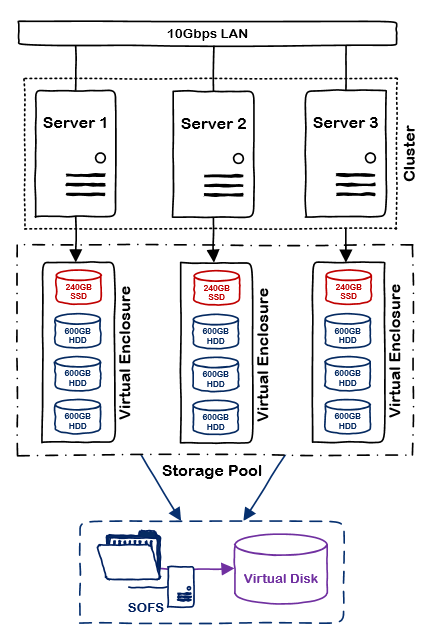
Storage Spaces Direct
Clustering creates virtual enclosures using the local disks in each storage node. Data is the automatically replicated and tiered according to the policy of the virtual disk. There are several recommendations for this release:
- A minimum of 4 nodes is recommended to ensure availability of data in servicing and failure scenarios
- 10Gbps network with RDMA is the recommended backplane between nodes
- Three-way mirrored virtual disks are recommended
- The server HBA must be capable of pass-through or JBOD mode
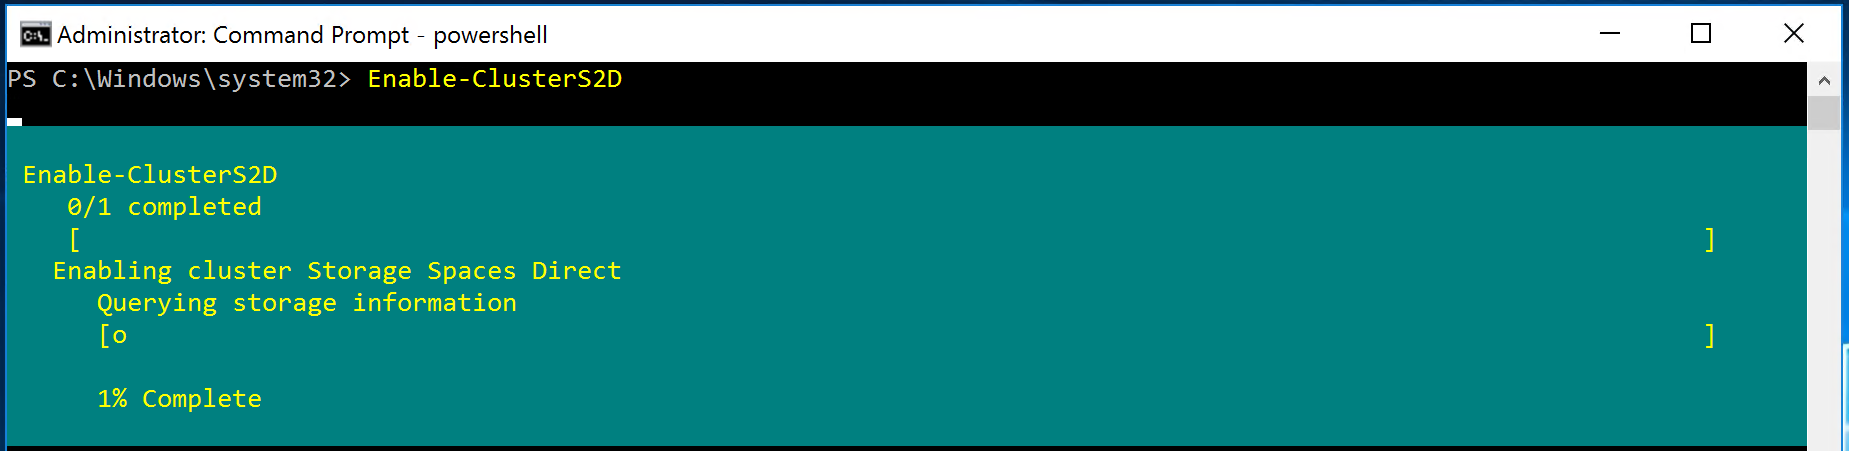
All of the other features you know and love about Storage Spaces work in conjunction with this feature. So how do we configure this? Powershell of course. Standard cluster configuration applies, and it’s assumed you have a working cluster, network configured, and disks ready to go. The process of configuring S2D has been streamlined to a single command in Server 2016: Enable-ClusterS2D. This command will scan all available storage on cluster nodes, add the physical disks to a new storage pool, and create two storage tiers based on the disk characteristics. Alternatively, you can manually create the storage pool and tiers by skipping the eligibility checks when enabling S2D.
We can confirm S2D has been enabled by looking at the cluster properties:
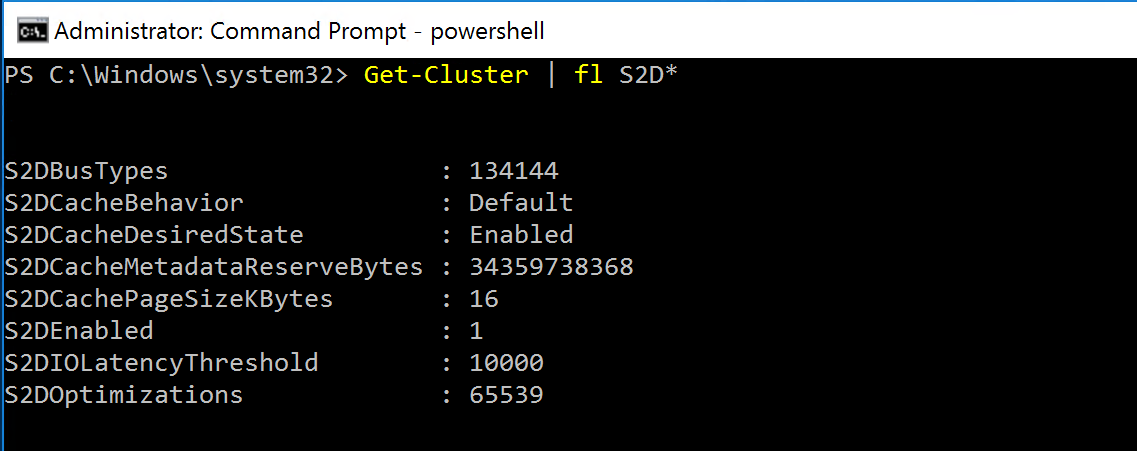
Storage Spaces Direct Cluster Properties
And that enclosures have been created, and all disks are recognized by the cluster:
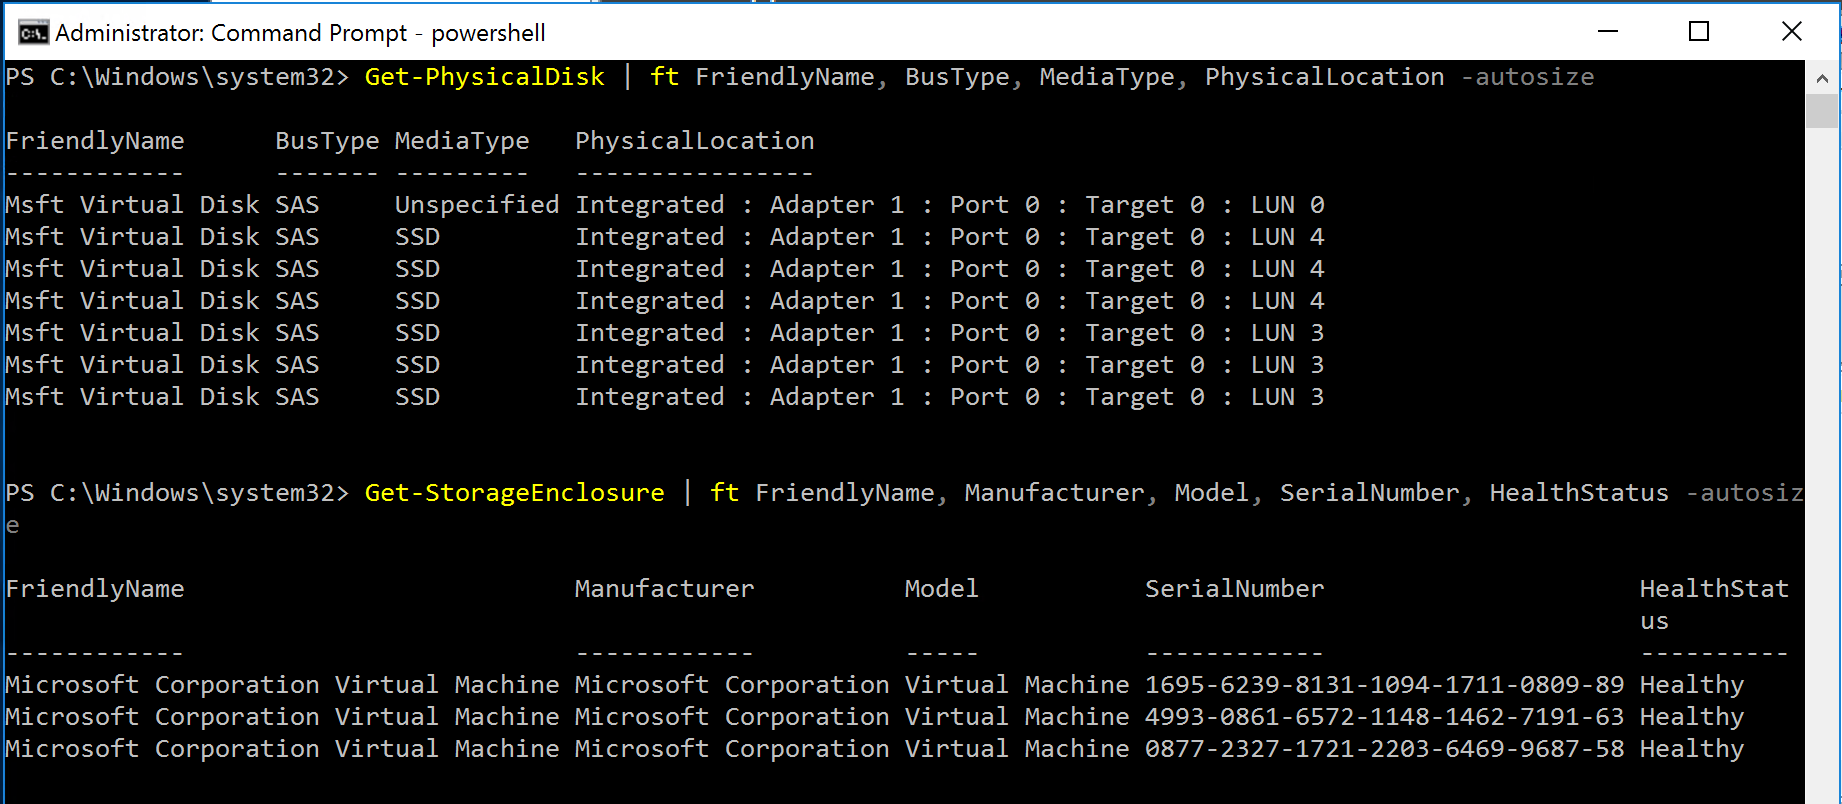
Disks and Enclosures
The storage pool and tiers should also now be visible, I chose to create mine manually (see my post on SSD’s and Storage Spaces Performance).

Storage Spaces Direct Storage Pool
If the media type of your disks shows up as “Unspecified” which can happen with a guest cluster on a 3rd party hypervisor like ESXi, you can set them manually to HDD/SSD now that there are in a storage pool like so:
Get-StoragePool pool1 | Get-PhysicalDisk | Set-PhysicalDisk -MediaType SSD
The enclosures, disks and storage pool will now appear in Failover Cluster Manager:
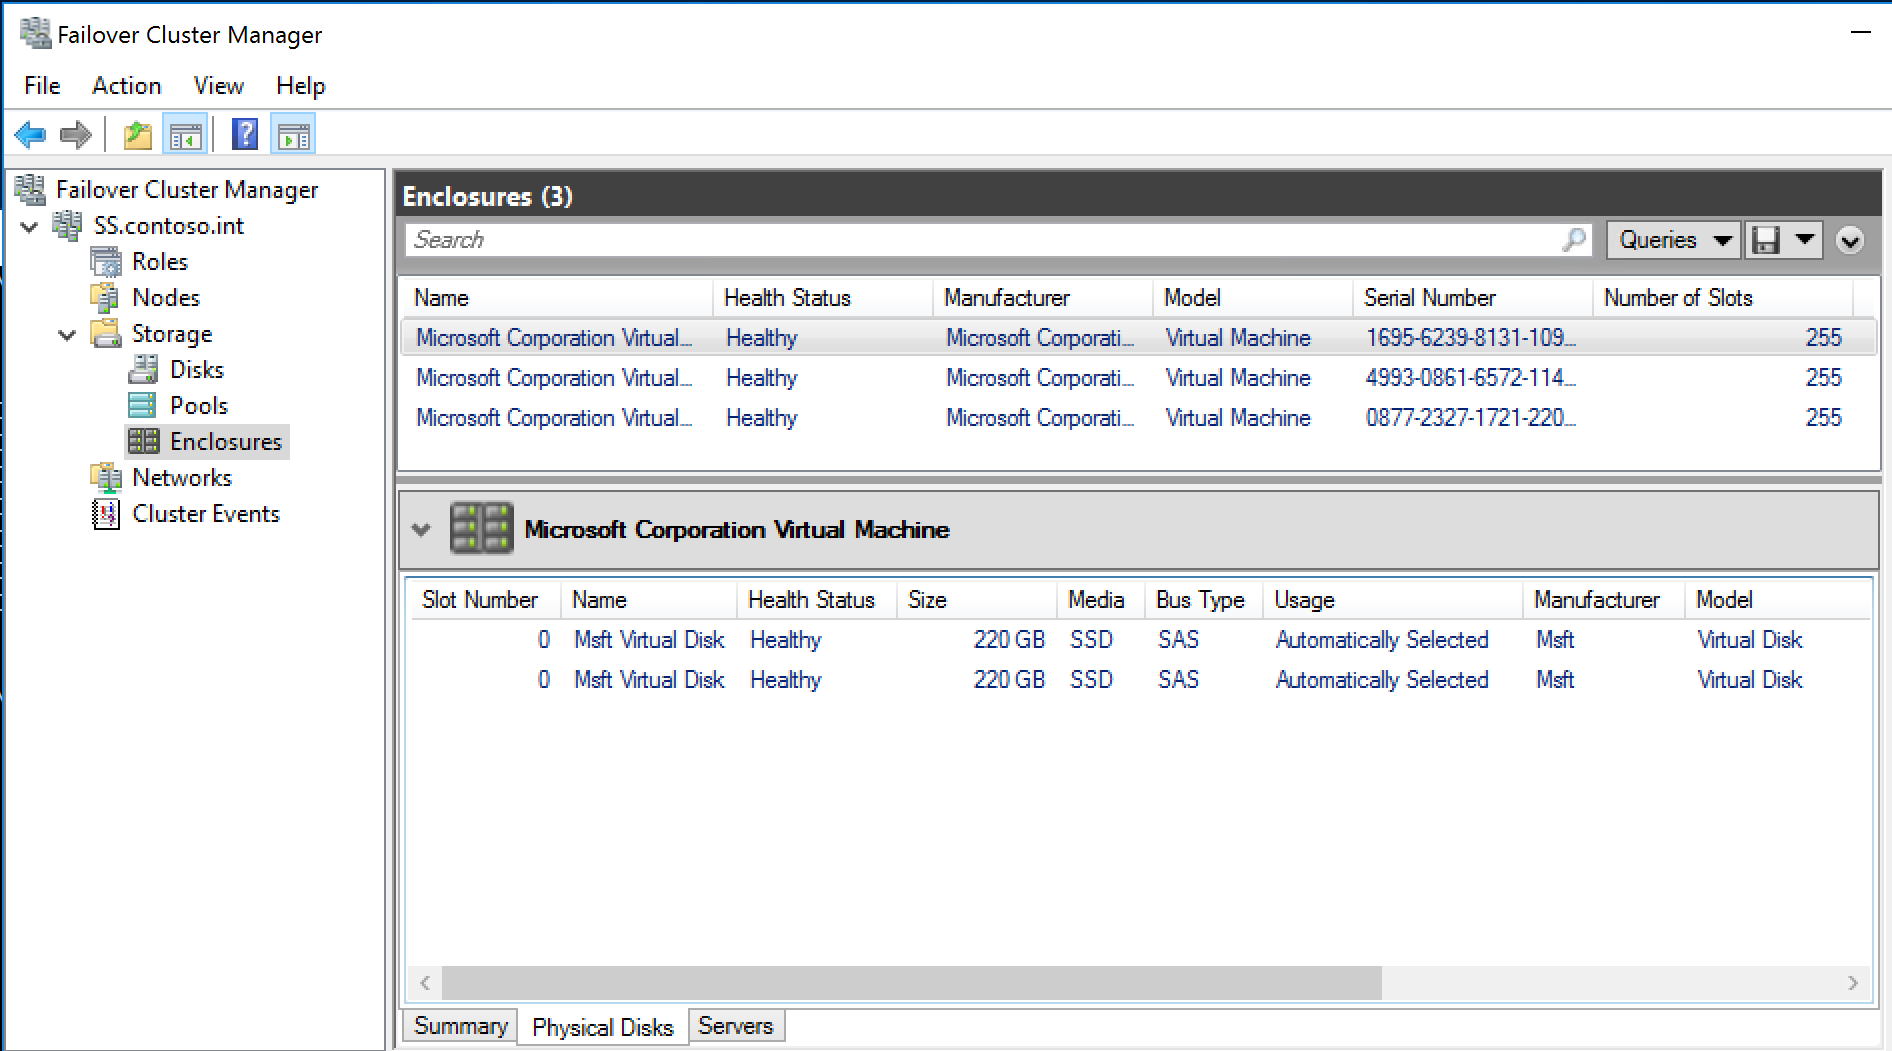
Failover Cluster Manager Enclosures and Disks
Lastly, we’ll create a virtual disk (you can do this through the GUI as well). You’ll want to tweak the number of columns for your environment (hint: for number of columns, it’s best not to exceed the number of local disks per virtual enclosure):
New-Volume -StoragePoolFriendlyName “pool1” -FriendlyName “vm-storage1” -PhysicalDiskRedundancy 2 -FileSystem CSVFS_NTFS -ResiliencySettingName Mirror -Size 250GB
Viola! We have a mirrored virtual disk that’s been created using storage spaces direct:
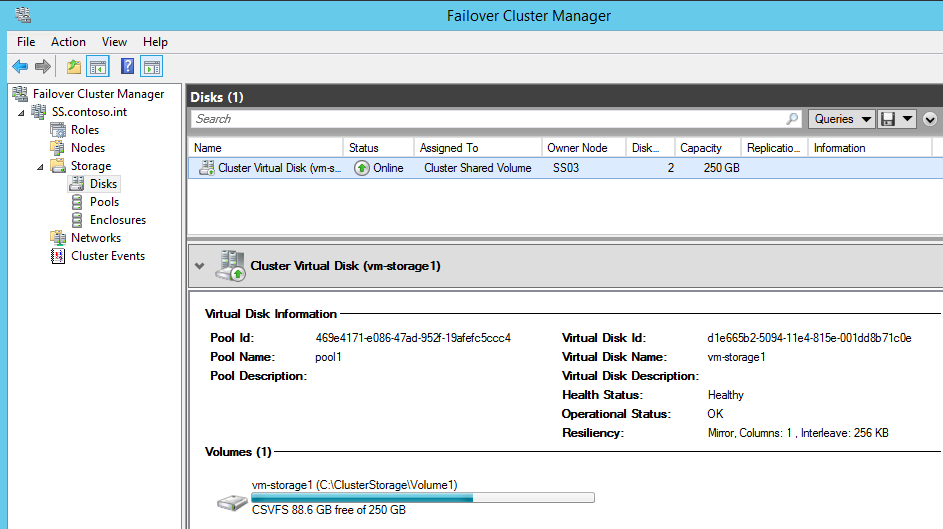
Virtual Disk
Rebooting a node will cause the pool and virtual disk to enter a degraded state. When the node comes back online, it will automatically begin a background Regeneration storage job. The fairness algorithm we set earlier will ensure sufficient disk IO access to workloads while regenerating the data as quickly as possible – this will saturate the network bandwidth, which, in this case, is a good thing. You can view the status of the running job by using the Get-StorageJob cmdlet. Disk failures are handled the same there were previously, retire and then remove the disk.
Regarding resiliency, I ran several IO tests while performing various simulated failures:
Node Reboot – 33% performance drop for 20s then full performance, 10% performance drop during regeneration
Node Crash (hard power cycle) – Full IO pause for 20s then full performance, 10% performance drop during regeneration
Disk Surprise Removal – Full IO pause for 4s then full performance, 10% performance drop during regeneration
Note that when using Hyper-V over SMB, the IO pause does not impact running VM’s. They will see increased latency, but the VM’s will continue to run.