Replace noisy power supply fan in HP Proliant Gen7 Microserver

My 3.5 year old HP Proliant Gen7 MicroServer’s power supply fan starting getting noisy, so I set out to find a replacement. I had a similar issue with the GPU fan on my Sapphire Radeon HD 5770 about a year ago, and I remember from that project, finding a specialty replacement fan isn’t easy.

I scoured forums for hours trying to find a drop-in replacement, but wasn’t very successful. Most people seem to prefer swapping out the stock PSU for a PicoPSU. That moves the transformer outside of the case (like a laptop power supply) but leaves an ugly hole in the back of the system with wires sticking out. I prefer keeping to stock designs when I can, so I wanted to narrow down at least a replacement fan that would fit the stock PSU.

The HP ProLiant MicroServer owners’ thread on Hardforum.com was one of the best resources. Specifically, post 896 from bluefull gave several possible drop-in replacements for the stock T&T 4020HH12S-ND1 fan. Additionally, there was some great information in the HP ProLiant MicroServer N40L Owner’s Thread *Part 5* on avforums.com. Shawry, beginning in post #558, describes the main issue with these fans – even though they are rated for 12V, the PSU is actually only putting out 5V. One fan in particular caught my eye, the Noiseblock BlackSilent Pro series. According to the specifications on the overclockers.co.uk site, the fan had a starting voltage of 5V and an operating voltage of 5-13.2V which I had hoped would work as a drop-in replacement. I was able to find the NB BlackSilent Pro PM-2 40mm in the US at frozencpu.com and ordered one.

The fan uses a standard 3-pin Molex connector with a signaling cable, but the stock fan uses a smaller 2-pin 4mm mini-Molex connector. Unfortunately, I forgot to order a 2-pin to 3-pin adapter, so I had to resort to cutting the old connector from the stock fan and splicing it onto the new fan’s power cable. I wasn’t overly concerned with doing this as the NB BlackSilent Pro is ingeniously designed with a break-away power connector for using different length power cables and the fan comes with both a 20cm and 50cm cable. At any rate, the fan fits perfectly into the psu, but I wasn’t able to get it to spin up by connecting it to the fan header inside the PSU. Not to worry, the design of the fan and the PSU lends itself to allowing you to connect the fan to a standard 4-pin Molex power connector while still ensuring proper fit into the case.

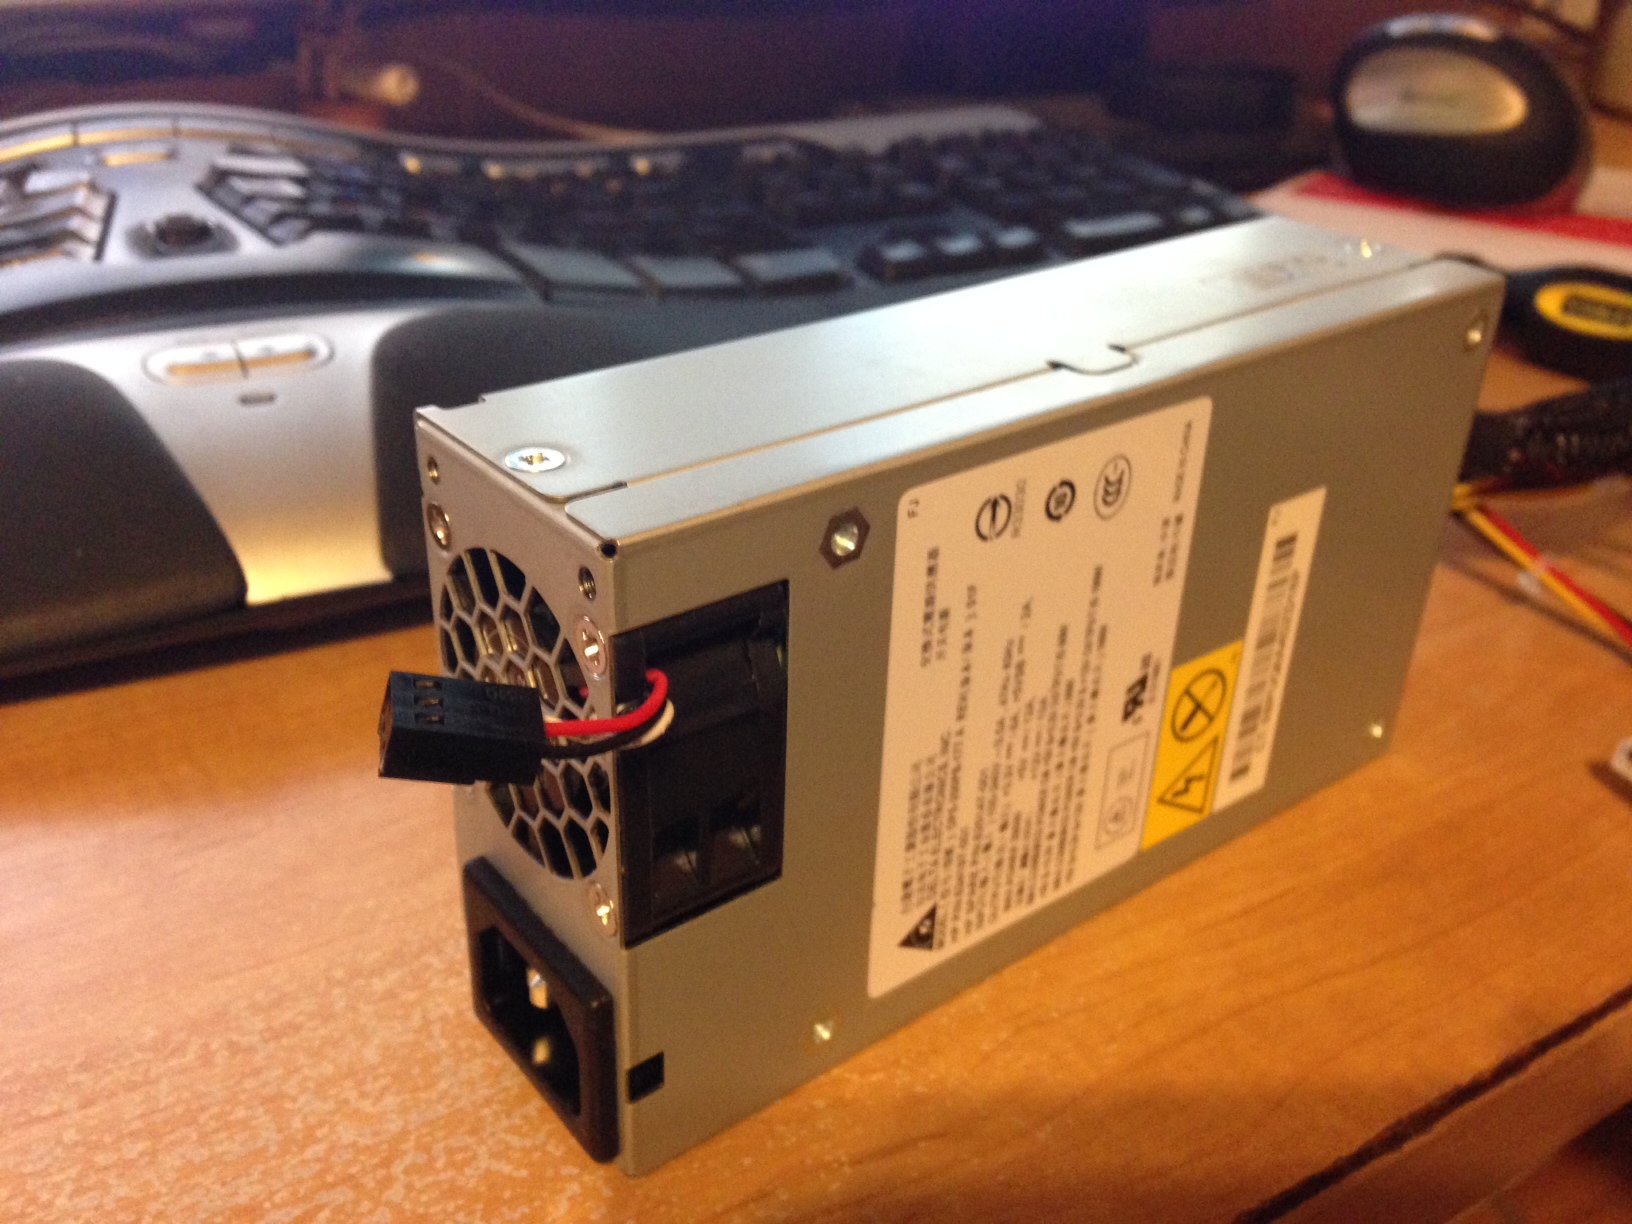
I installed the fan so the power connector would route outside of the power supply like so:

The HP Proliant MicroServer psu with the replacement NoiseBlocker BlackSilent Pro PM-2 fan

The Proliant MicroServer PSU with the replacement NoiseBlocker BlackSilent Pro fan

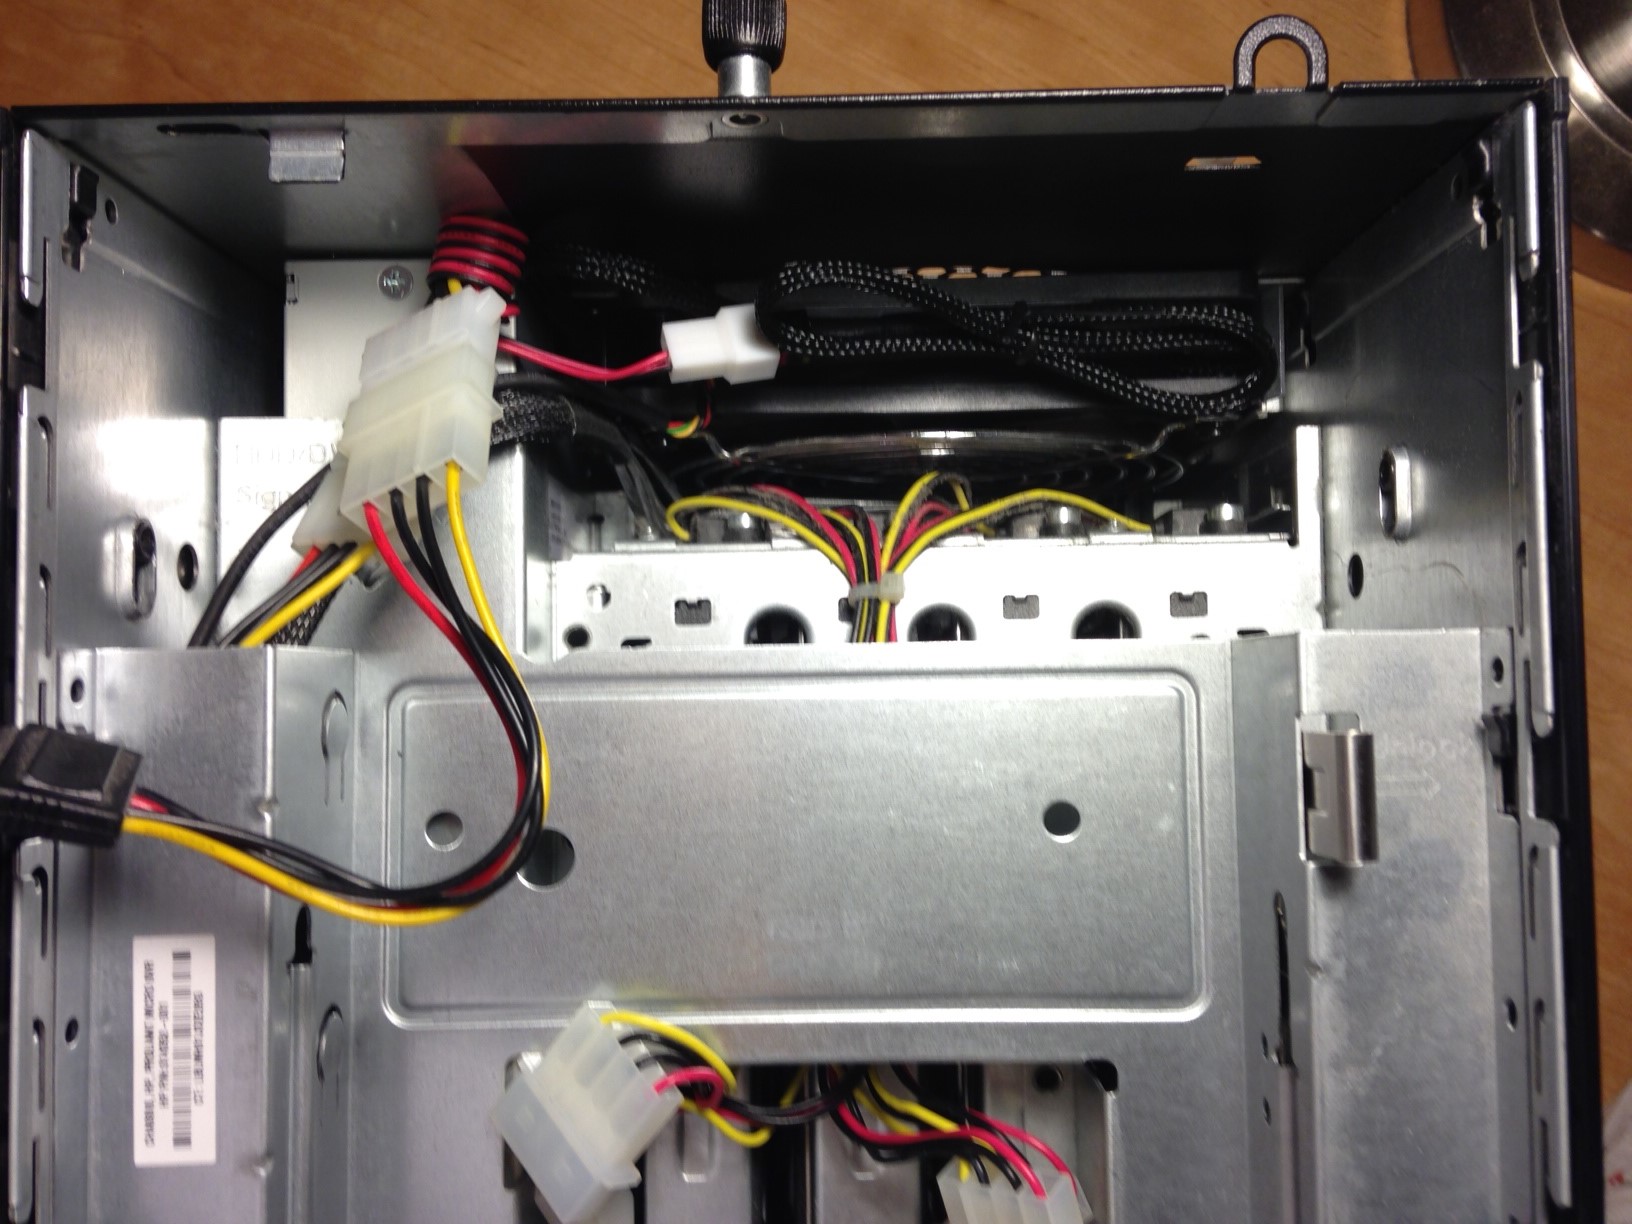
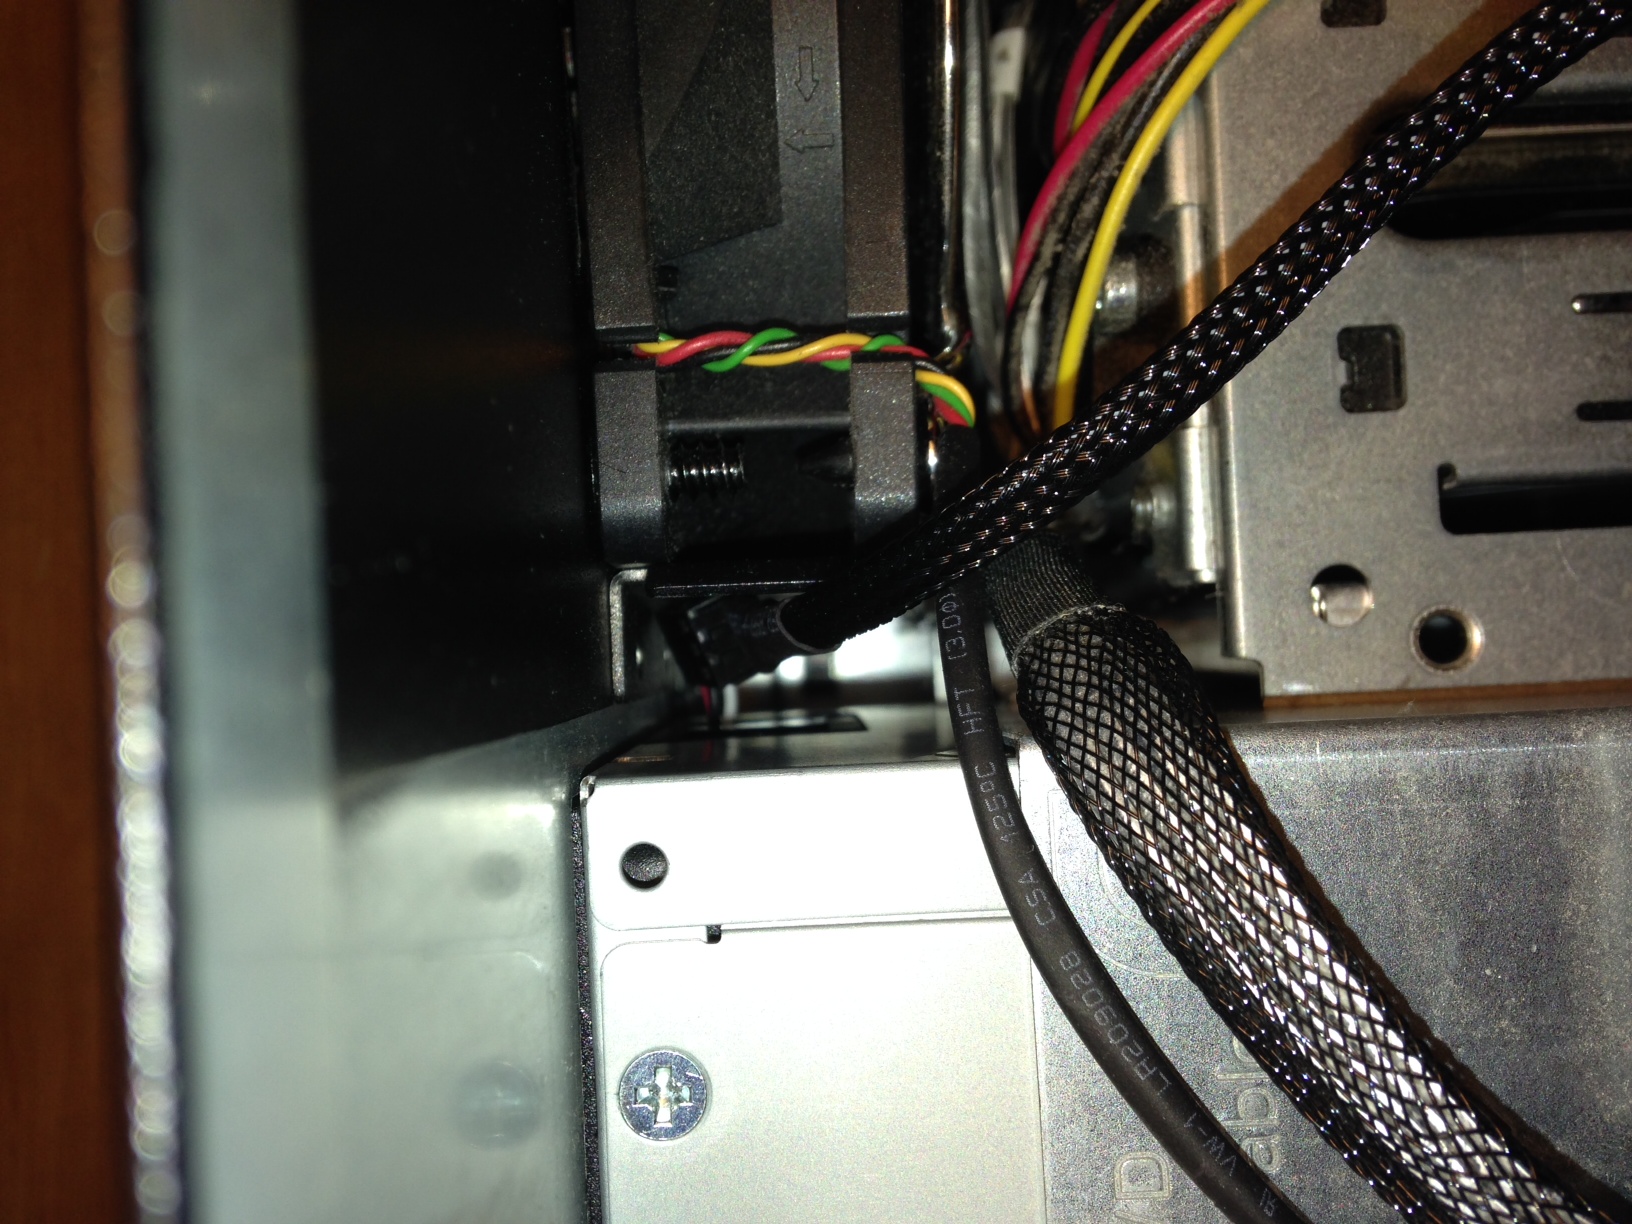
I was able to easily slide the power supply back into place, and the connector was then accessible between the PSU and case fan:

The CPU power cable next to the MicroServer case fan

The CPU power cable next to the MicroServer case fan

I then used a standard 4-pin to 3-pin adapter to piggy back off the optical drive power connector:

The PSU power cable connected to a 3-pin to 4-pin Molex adapter.

The PSU power cable connected to a 3-pin to 4-pin Molex adapter

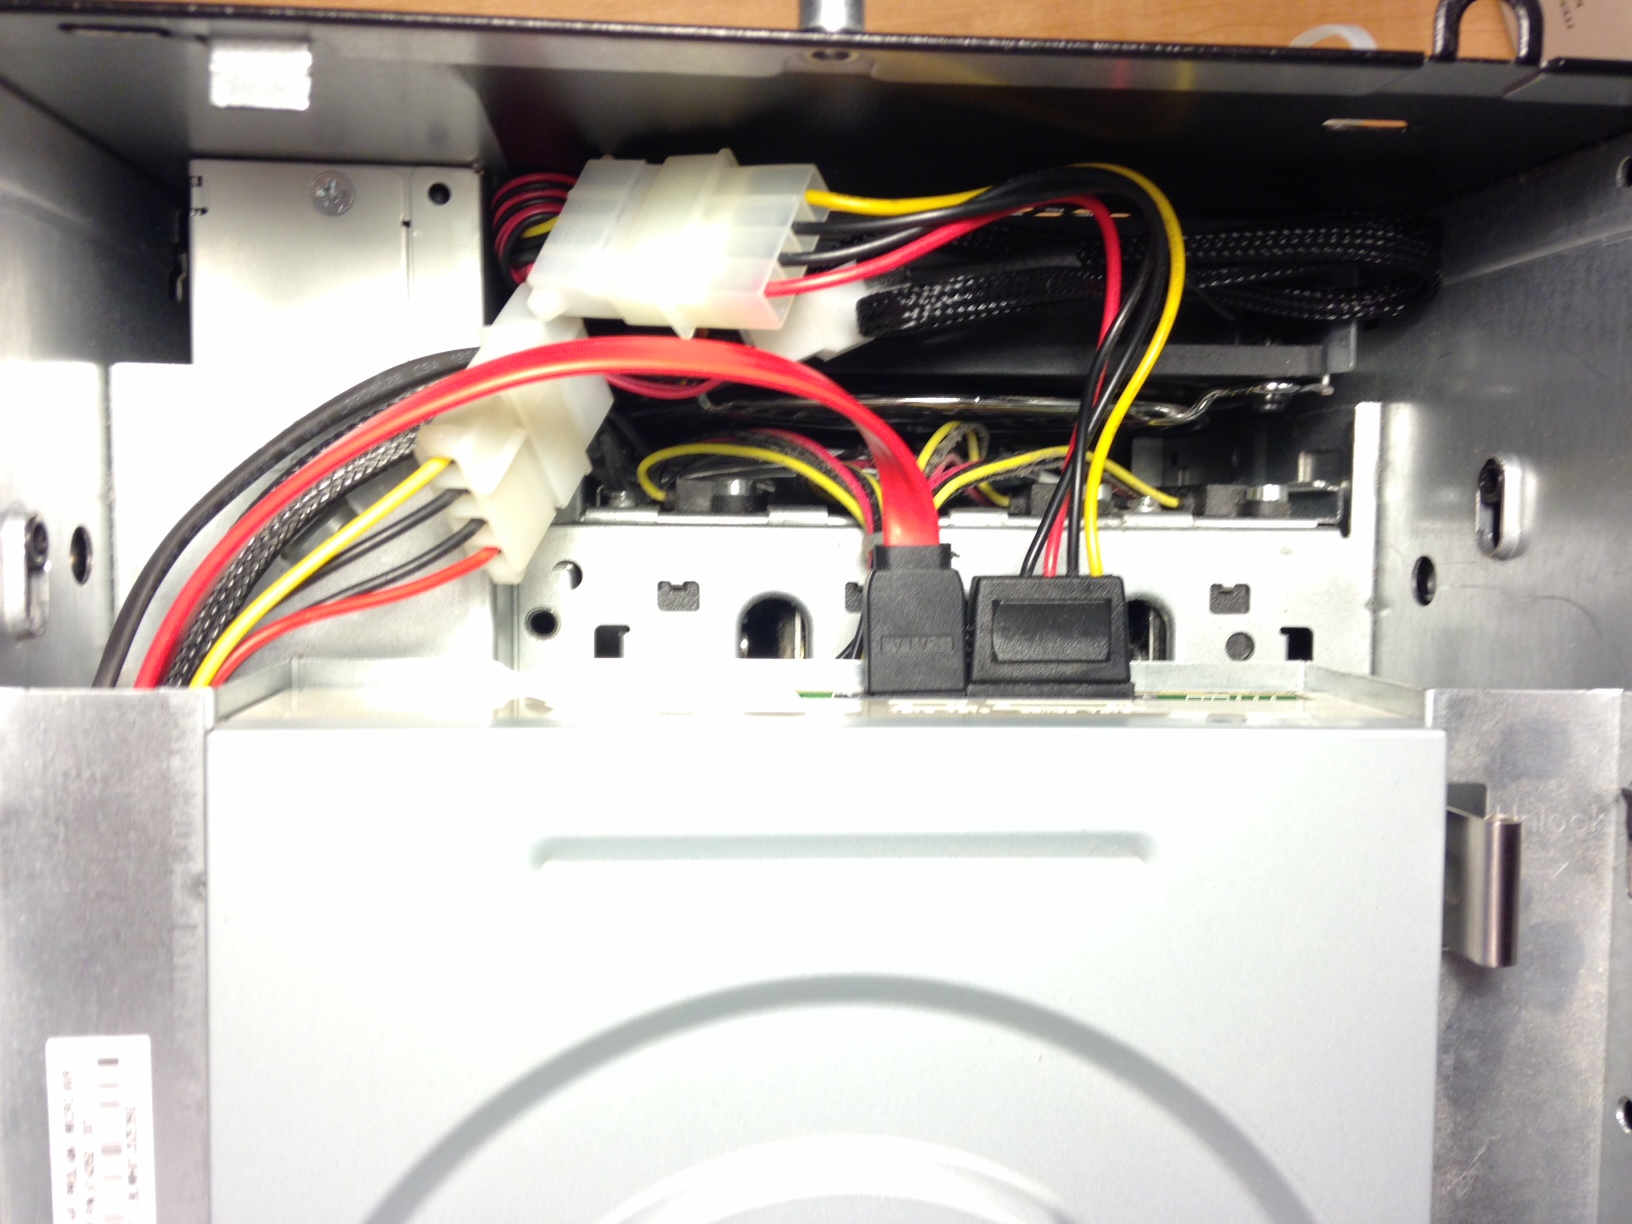
Everything fits nicely in the space behind the optical drive:

HP Proliant Microserver


Fan spun up without issue once the server was powered on.

A side note, I had originally thought the noise was coming from the case fan and went through the effort of ordering a Cougar Vortex CF-V12HPB PWM fan as a replacement, only to find out the HP MicroServer fan header uses a custom pinout. The server will not boot if it does not properly detect the case fan, so if replacing the case fan, you’ll need to swap the conductor pins to the proper slots.
Resolving error 0x8007007e Cannot cannect to wmi provider

Recently, I had to troubleshoot a problem with SQL backups via Microsoft Data Protection Manager 2012 SP1 for a SQL Server 2008 system. DPM was alerting us that database auto-protection failed with error code ID 32511. The detailed errors showed that DPM could not enumerate SQL Server instances using Windows Management Instrumentation on the protected computer. This error was detailed in the DPMRACurr.errlog on the production server:

WARNING Failed: Hr: = [0x8007007e] : unable to execute the WQL query: SELECT * FROM ServerSettings

This pointed to a problem with the underlying WMI configuration for SQL, so I used wbemtest.exe from the remote DPM server to test WMI connectivity. If you are unsure of exactly what WMI namespaces are in use or what queries are being run, you can use WMI Tracing to see what’s happening under the hood.

Log Name: Microsoft-Windows-WMI-Activity/Trace
Source: Microsoft-Windows-WMI-Activity
Date: 10/22/2013 3:59:39 PM
Event ID: 1
Task Category: None
Level: Information
Keywords:
User: SYSTEM
Computer: SERVERNAME
Description:
GroupOperationId = 9283379; OperationId = 9300341; Operation = Start IWbemServices::ExecQuery – SELECT * FROM ServerSettings; ClientMachine = DPMSERVER; User = jeff; ClientProcessId = 2540; NamespaceName = \\.\root\Microsoft\SqlServer\ComputerManagement10

Once wbemtest is open, connect to the appropriate namespace:

SQL 2005
\\SERVERNAME\root\Microsoft\SqlServer\ComputerManagement

SQL 2008 & 2008 R2
\\SERVERNAME\root\Microsoft\SqlServer\ComputerManagement10

SQL 2012
\\SERVERNAME\root\Microsoft\SqlServer\ComputerManagement11

Once connected, try executing the WQL query that your application is using – in my case, it was SELECT * FROM ServerSettings. Doing this resulted in the error:

Number: 0x8007007e
Facility: Win32
Description: The specified module could not be found.

Some quick research shows this can most often be resolved by recompiling the WMI template for SQL with mofcomp:

http://support.microsoft.com/kb/956013

On 64-bit Windows with SQL 2008, the command is:

mofcomp “C:\Program Files (x86)\Microsoft SQL Server\100\Shared\sqlmgmproviderxpsp2up.mof”

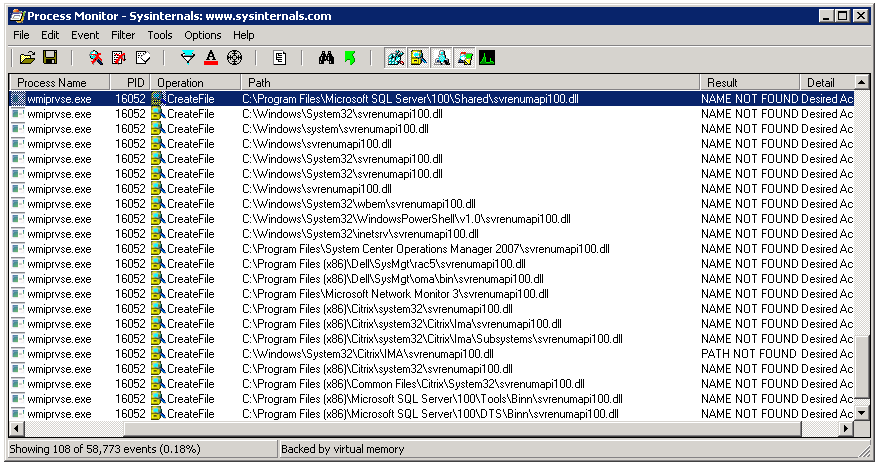
You may need to adjust the command for bitness and version of SQL and then restart the WMI service for the changes to take effect. However, this did not resolve the issue on the specific system where I was encountering the problem. The same error was returned when trying to run a query in wbemtest after recompiling and restarting the service, the DPM console also displayed the same error when attempting to enumerate SQL instances. The 0x8007007e error typically means a DLL or registration is missing. Time to break out procmon and see what’s happening under the covers. Using filters to include only the wmiprvse.exe process and excluding entries with a SUCCESS result, I could see that there was a file it seemed to be looking for, but could not find:

Procmon WMI SQL


It seemed to be scouring the path looking for sqlmgmprovider.dll and svrenumapi100.dll. I checked on disk, and sure enough, neither of those files existed under the path C:\Program Files\Microsoft SQL Server\100\Shared, however, their 32-bit counterparts were located under C:\Program Files\Microsoft SQL Server\100\Shared. Checking another  64-bit SQL 2008 server, I was able to find those files under that first path. After copying them from a known working system, the error was resolved. Also, the second file was only listed in procmon once I copied the first to the server and retested, so it make take several passes to completely resolve.

Note that this resolved this specific error for me, though it may not be the best solution. The reason those files were not on the server is because there was only a 32-bit instance of SQL Server on the system. By adding those two files and re-running wbemtest, an error was no longer returned, but the query also did not show any instances of SQL Server because it was querying for 64-bit instances.

Powershell Remoting

One of the most powerful features of Powershell is the ability to issue commands to remote systems, better known as Powershell remoting. This further lessens the need for console or remote desktop access to administer systems. Powershell remoting was introduced in v2 and relies on the Windows Remote Management service (WinRM) to issue commands to remote systems.

Enabling PowerShell remoting is fairly simple. For a single system on a domain, you can run the Enable-PSRemoting -Force cmdlet which will perform necessary configuration steps. You can also ensure WinRM is configured properly using the quickconfig command:

winrm quickconfig

You can use Group Policy if you need to enable remoting on multiple systems. Do this by automatically configuring the WinRM service:

Computer Configuration\Policies\Administrative Templates\Windows Components\Windows Remote Management (WinRM)\WinRM Service\Allow automatic configuration of listeners

Enable this GPO setting and use * for IPv4 and IPv6 filters (unless you wish to limit WinRM requests to specific source IP ranges). In a non-domain environment, you will need to add the remote system to the TrustedHosts list on the client system:

winrm s winrm/config/client ‘@{TrustedHosts=”RemoteSystem”}’

Alternatively, for non-domain environments, you can configure WinRM to allow SSL connections. You will need a “Server Authentication” certificate installed in the local computer certificate store, with a CN matching the hostname that is not expired, revoked, or self-signed. WinRM then needs to be configured for HTTPS using the certificate:

winrm quickconfig -transport:https

To check the current WinRM configuration, use the get command:

winrm get winrm/config

Once WinRM is configured properly, ensure there is a firewall rule in the local Windows Firewall allowing inbound traffic on port 5985 (and port 5986 for SSL). If WinRM is not properly configured, or there is a firewall blocking traffic, you will likely see an error similar to this:

[RemoteSystem] Connecting to remote server RemoteSystem failed with the following error message : WinRM cannot complete the operation. Verify that the specified computer name is valid, that the computer is accessible over the network, and that a firewall exception for the WinRM service is enabled and allows access from this computer. By default, the WinRM firewall exception for public profiles limits access to remote computers within the same local subnet. For more information, see the about_Remote_Troubleshooting Help topic.
+ CategoryInfo : OpenError: (RemoteSystem:String) [], PSRemotingTransportException
+ FullyQualifiedErrorId : WinRMOperationTimeout,PSSessionStateBroken

Test Powershell remoting with the Test-WSMan cmdlet:

Test-WSMan -Computer RemoteSystem

Which will output something similar to this:

wsmid : http://schemas.dmtf.org/wbem/wsman/identity/1/wsmanidentity.xsd
ProtocolVersion : http://schemas.dmtf.org/wbem/wsman/1/wsman.xsd
ProductVendor : Microsoft Corporation
ProductVersion : OS: 0.0.0 SP: 0.0 Stack: 2.0

Now that WinRM is configured properly, we can open a remote powershell session from the client system:

Enter-PSSession -ComputerName RemoteSystem -Credential username

The credential parameter is optional on domain-joined systems but can be used to open a remote Powershell session as a specific user. If the remote system cannot authenticate the client because it is not domain joined and you have not added it to the TrustedHosts list, you will receive an error similar to this:

Enter-PSSession : Connecting to remote server RemoteSystem failed with the following error message : The WinRM client cannot process the request. If the authentication scheme is different from Kerberos, or if the client computer is not joined to a domain, then HTTPS transport must be used or the destination machine must be added to the TrustedHosts configuration setting. Use winrm.cmd to configure TrustedHosts. Note that computers in the TrustedHosts list might not be authenticated. You can get more information about that by running the following command: winrm help config. For more information, see the about_Remote_Troubleshooting Help topic.
At line:1 char:1
+ Enter-PSSession -ComputerName RemoteSystem -Credential jeff
+ ~~~~~~~~~~~~~~~~~~~~~~~~~~~~~~~~~~~~~~~~~~~~~~~~~~~~~~~~
+ CategoryInfo : InvalidArgument: (RemoteSystem:String) [Enter-PSSession], PSRemotingTransportException
+ FullyQualifiedErrorId : CreateRemoteRunspaceFailed

You can also run commands on several remote systems simultaneously (this example will force a checkin with the WSUS server):

Invoke-Command -ComputerName RemoteSystem1, RemoteSystem2 -ScriptBlock {wuauclt /reportnow}

Happy Remoting!