Scale-out File Server (SOFS) is a feature that allows you to create file shares that are continuously available and load balanced for application storage. Examples of usage are Hyper-V over SMB and SQL over SMB. SOFS works by creating a Distributed Network Name (DNN) that is registered in DNS to all IP’s assigned to the server for which the cluster network is marked as “Cluster and Client” (and if the UseClientAccessNetworksForSharedVolumes is set to 1, then additionally networks marked as “Cluster Only”). DNS natively serves up responses in a round robin fashion and SMB Multichannel ensures link load balancing.
If you’ve followed best practices, your cluster likely has a Management network where you’ve defined the Cluster Name Object (CNO) and you likely want to ensure that no SOFS traffic uses those adapters. If you change the setting of that Management network to Cluster Only or None, registration of the CNO in DNS will fail. So how do you exclude the Management network from use on the SOFS? You could use firewall rules, SMB Multichannel Constraints, or the preferred method – the ExcludeNetworks parameter on the DNN cluster object. Powershell to the rescue.
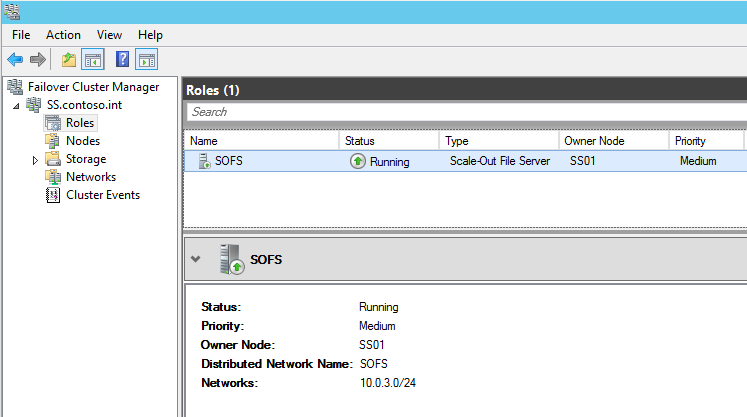
First, let’s take a look at how the SOFS is configured by default:
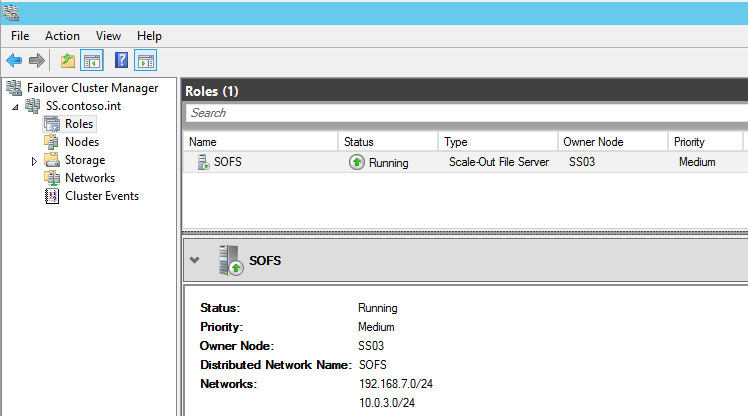
Scale-out file server cluster access point
In my configuration, 192.168.7.0/24 is my management network and 10.0.3.0/24 is my storage network where I’d like to keep all SOFS traffic. The CNO is configured on the 192.168.7.0/24 network and you can see that both networks are currently configured for Cluster and Client use:
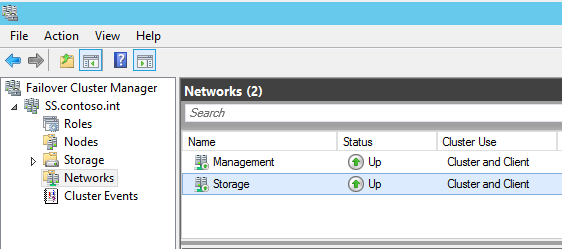
Cluster networks
Next, let’s take a look at the advanced parameters of the object in powershell. “SOFS” is the name of my Scale-out File Server in failover clustering. We’ll use the Get-ClusterResource and Get-ClusterParameter cmdlets to expose these advanced parameters:
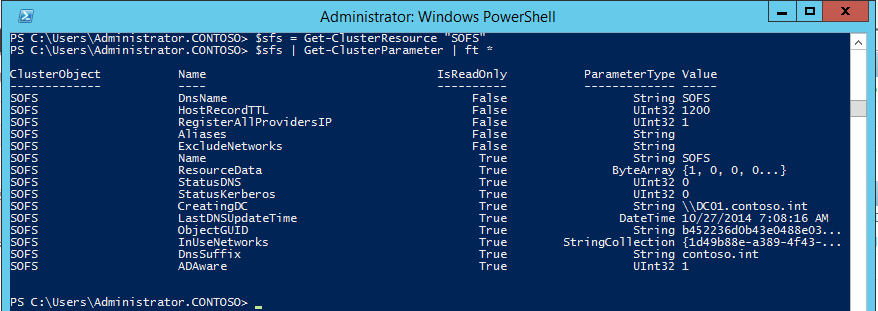
Powershell cluster access point
You’ll notice a string parameter named ExcludeNetworks which is currently empty. We’ll set that to the Id of our management network (use a semicolon to separate multiple Id’s if necessary). First, use the Get-ClusterNetwork cmdlet to get the Id of the “Management” network, and then the Set-ClusterParameter cmdlet to update it:
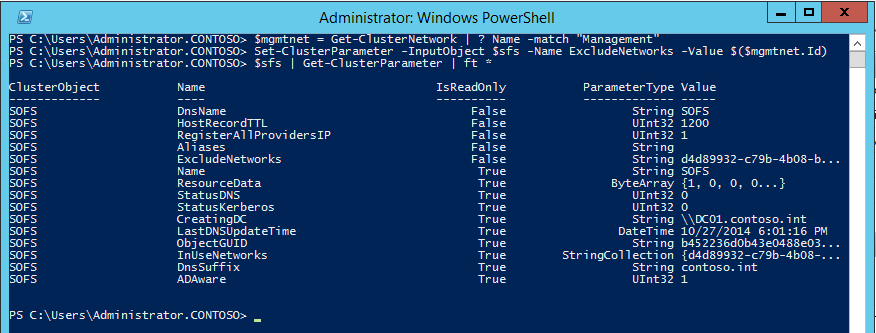
Powershell cluster set-parameter
You’ll need to stop and start the resource in cluster manager for it to pick up the change. It should show only the Storage network after doing so:
Scoped cluster access point
Only IP’s in the Storage network should now be registered in DNS:
PS C:\Users\Administrator.CONTOSO> nslookup sofs
Server: UnKnown
Address: 192.168.7.21
Name: sofs.contoso.int
Addresses: 10.0.3.202
10.0.3.201
10.0.3.203