Since I deployed my HP Proliant Microserver, I had been running ESX from a USB flash drive. Now that Windows 8 Beta is available, I wanted to test out some of the new Hyper-V features in my home lab. All the talk about Windows To Go had me thinking it would be a good test to run Windows 8 Hyper-V server from a USB flash drive. After all, deploying Microsoft Hyper-V Server 2008 R2 on a USB Flash Drive was already supported.
I found a good tutorial about running Windows 8 Developer Preview from a UFD which outlines the process. If you’ve used WAIK before, then you’re familiar with the process which basically involves creating the partitions on disk, and then applying a WIM file to the partition. This process works great for Consumer edition on many UFD’s, however, Windows To Go is not supported with server edition. That doesn’t mean Windows 8 Server cannot be installed to a UFD though – it just means that the same rules apply as 2008 R2.
Specifically, the UFD needs to have it’s Removable Media Bit set to 0. This is a setting in the UFD’s controller that tells Windows how to treat the device. Typically, when you attach a UFD, Windows classifies the device as a Removable Disk:
There’s a couple of limitations that come with Removable Disks in Windows though. Specifically, you can’t create multiple partitions on them (even if you do via other partitioning methods, Windows will only show you the first partition), and you can’t run Windows directly from them. So, in order to deploy Windows 8 server to a UFD, the RMB needs to be set to 0.
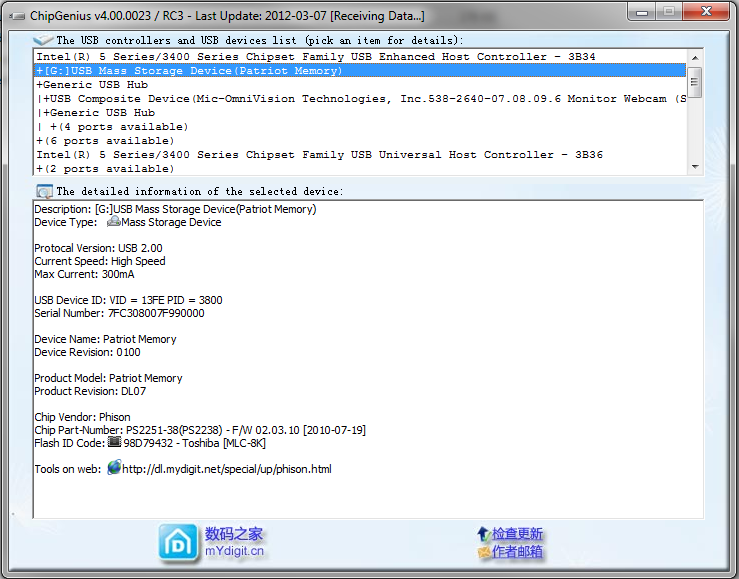
Some UFD manufacturers provide utilities to set this. Lexar has the BootIt utility for instance. This utility may work for UFD’s manufactured by others provided it’s using the same controller. After some searching, I came across and excellent thread that described how to flip the Removable Media Bit for non-Lexar UFD’s. The ChipGenius and USBDeview utilities will give you detailed information about the Controller in the UFD:
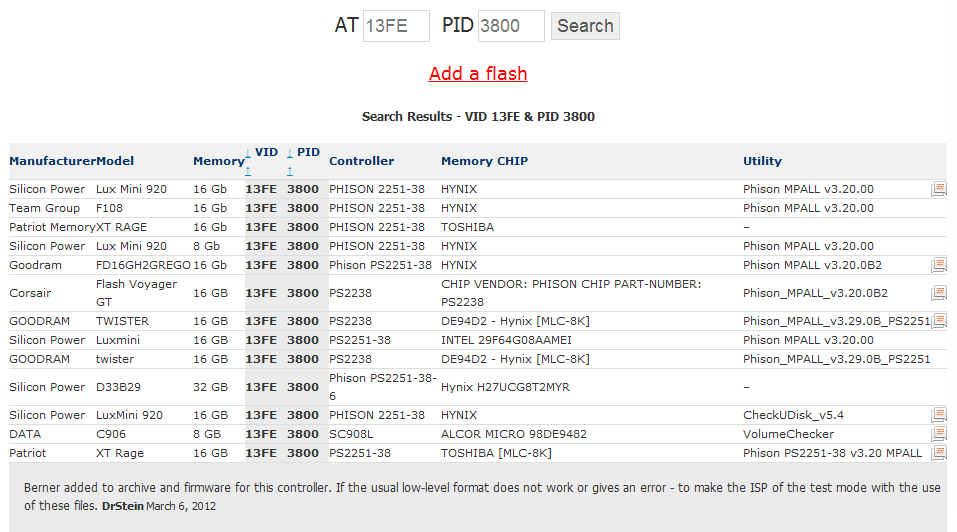
This tool provides a few critical pieces of information: The Chip Vendor, Part Number, VID and PID. Using the VID and PID, you can find out if there is a tool available that will allow you to program the UFD controller. Head over to the Russian site flashboot.ru (I recommend using Chrome and you can auto-translate the page) and enter your VID and PID. This will list all known UFD’s matching those ID’s and let you know what utility you can use to program the controller, as well as helpful hints from other users. In my case, the Patriot XT Rage 16GB UFD showed up in the list:
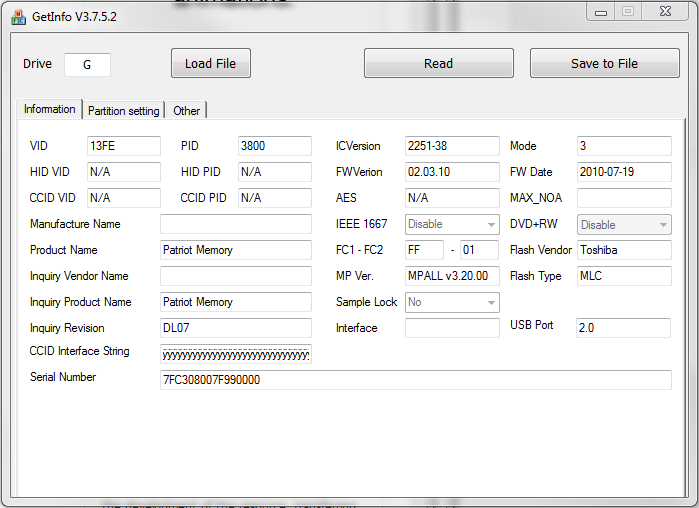
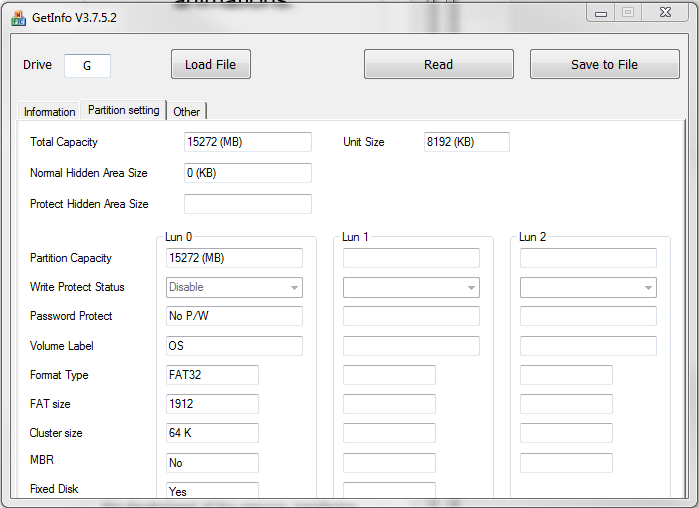
In my case, I needed to use Phison’s MPALL tool (version 3.20) to program the Phison PS2251-38 controller on the Patriot XT Rage 16GB UFD. FlashBoot.ru has a catalog of all utilities for Phison controllers and I was able to easily download the necessary version. Inside the MPALL archive, you’ll find a few utilities. The first is GetInfo which displays current configuration of the controller:
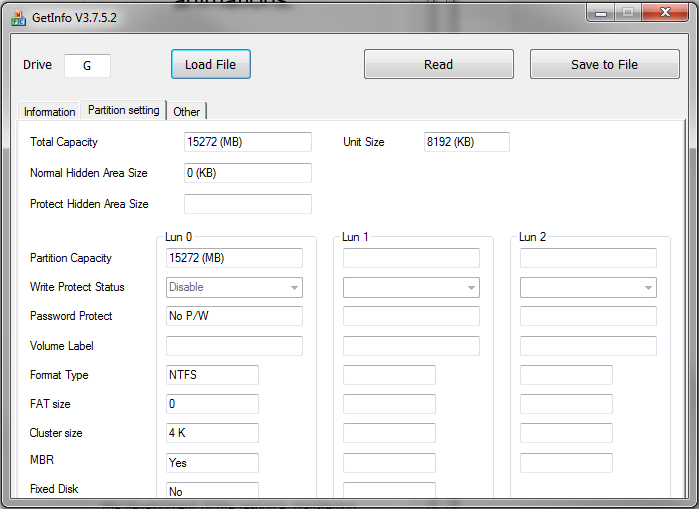
The second tab has partition information:
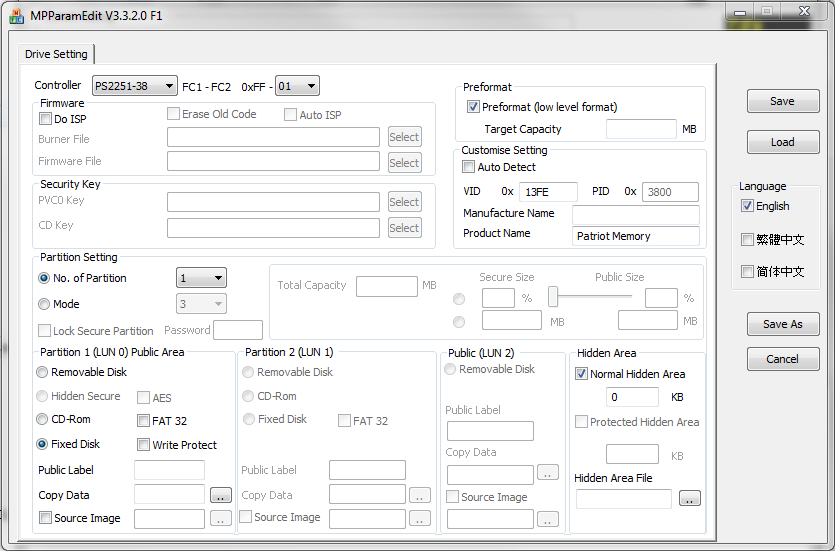
Notice the Fixed Disk setting of “No” – this is the RMB on Phison controllers. All that’s necessary is for us to update that using the other utilities in the archive. It took some testing/tweaking to figure out how things work with the Phison USB Mass Production Tool, and admittedly I’m a bit fuzzy on the specifics. However, it looks as though there are two controller configuration sections that need updating: F1 and F2 (I haven’t been able to find what these mean, but they seem to be common to all UFD’s). There are two Parameter Editor utilities that generate INI files that can then be used by the flash utility, one for the F1 configuration (writes to a MP.INI file) and one for the F2 configuration (writes to the QC.INI file). In here, we can set the UFD to be a Fixed Disk:
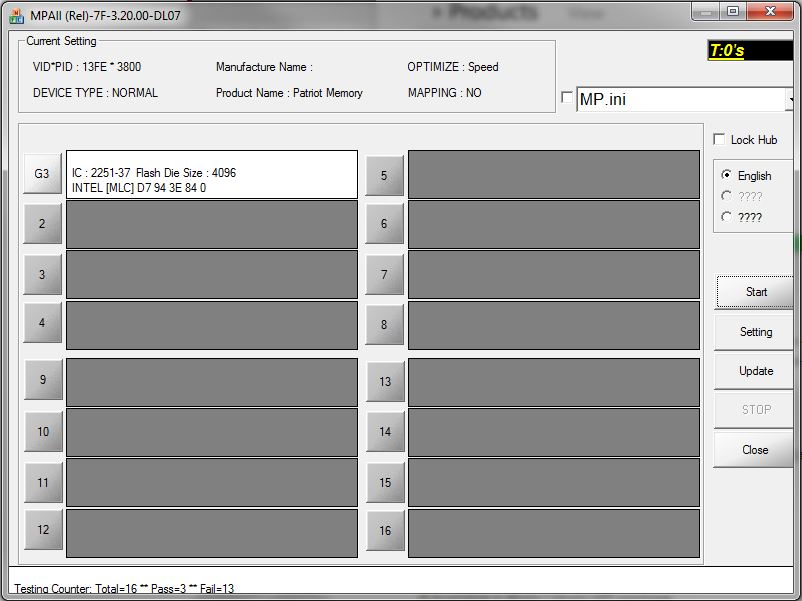
You will find all of the necessary information from the GetInfo screen for the Controller, FC1-FC2 settings, the VID and PID’s, etc. Once you have your settings in place, hit save to write them to the MP.ini file. From there, you can use the MPALL F1 utility to write the configuration to the UFD. When performing this procedure, ensure that ONLY the UFD you want to program is connected. Insert the USB flash drive, click the Update button which will populate the various boxes with ANY UFD found that has a Phison controller. Once it’s detected, click Start to program.
Once F1 is done, you’ll need to do the same for F2. I was unable to get it to successfully update the F2 settings using any of the versions, however, even though the MPALL F2 utility reported an error, GetInfo did show that both F1 + F2 where set on the controller after the update. A few notes that may save you some time:
- I’m not sure where the “MAPPING” setting comes from, but when I created my MP.INI and QC.INI files using the ParamEditor utilities, the MPALL utilities would not find my UFD. I had to add MAPPING=0 to the Configuration section of both files.
- The Inquiry Version of my UFD was PMAP to start and though I had it set in MP.INI, the MPALL F1 utility changed to to DL07. Because of this, my QC.ini had to have Inquiry Version set to DL07 in to avoid a Incorrect Inquiry Version error message.
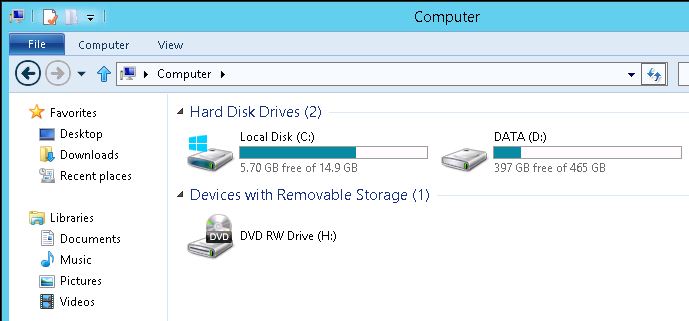
Once this is done properly, the partition will show as a fixed disk:
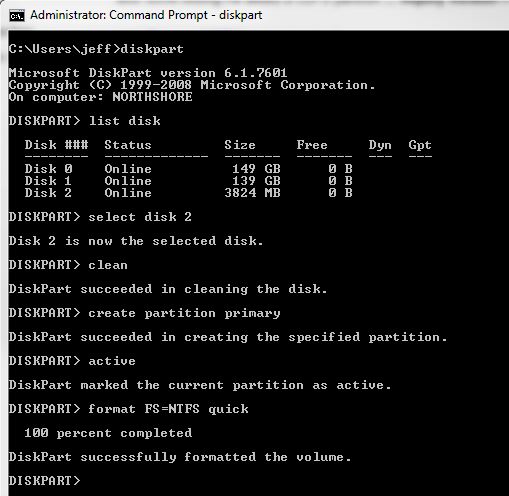
Now that we have a UFD with the RMB set to 0, we can proceed with deploying Windows 8 to it. Obviously, the FAT32 partition the pre-format created won’t work for Windows 8, so we’ll need to clean out that information. We’ll use diskpart for this – run the following commands from a command prompt:
select disk X
clean
create partition primary
active
format FS=NTFS quick
This will delete the existing partition table, create a new primary partition and mark it as active and then format it as NTFS. Now, we can use the imagex utility (available as part of the WAIK) to apply the install.wim file to the UFD. Either mount the ISO or insert the DVD and apply the image to the UFD:
imagex /apply F:\sources\install.wim 4 G:\
The number 4 is the index of the image in the WIM file to be applied. The Windows 8 beta media has multiple available (Standard Core, Standard w/ GUI, Datacenter Core, and Datacenter w/ GUI) so I’m applying Datacenter w/ GUI by selecting index 4. You can read the available options by using the imagex /info F:\sources\install.wim command. Once the image has been applied, we need to write a boot record using bcdboot:
bcdboot G:\windows /s G:\
If you’ve done everything correctly, you should now have a bootable UFD with a base install of Windows 8 Server that is recognized as a non-removable hard disk:

